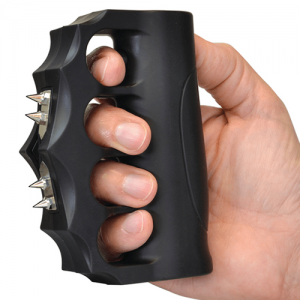
Are you the proud owner of a Taser Pulse and in need of a battery replacement? Look no further! This article serves as your friendly guide to help you easily replace the battery in your Taser Pulse. With simple step-by-step instructions, you’ll be back to feeling safe and secure in no time. Say goodbye to any worries about losing power in your personal protection device, as we have all the information you need to keep your Taser Pulse fully charged and ready for action. So let’s get started and ensure you have the power you need for peace of mind.
If you own a Taser Pulse, it is essential to know how to properly replace the battery to keep your device in optimal working condition. Follow these important safety precautions and step-by-step instructions to ensure a successful battery replacement.
Before you begin replacing the battery in your Taser Pulse, it is crucial to take some necessary safety precautions to protect yourself and prevent any accidents. Follow these guidelines to ensure a safe battery replacement process:
The first and most crucial step is to thoroughly read and understand the user manual provided with your Taser Pulse. The manual will provide you with essential information about the device, its components, and the recommended procedures for battery replacement.
Before performing any maintenance or replacing the battery, ensure that your Taser Pulse is unloaded. Remove the cartridge and ensure there are no live rounds in the device. This step is crucial for your safety and prevents accidental discharge.
To protect your hands and eyes during the battery replacement process, it is highly recommended to wear protective gloves and eyewear. This will prevent any potential injuries or accidents while handling the device or its components.
When replacing the battery, make sure you are in a well-ventilated area. This is important to prevent the build-up of any potentially harmful gases and to provide fresh air circulation during the process.
Before replacing the battery, ensure that your Taser Pulse is disconnected from any power sources. This will help avoid any electrical shocks or malfunctions during the replacement process.
Now that you are familiar with the safety precautions, let’s move on to the step-by-step instructions for replacing the battery in your Taser Pulse.
Before purchasing a new battery, it is essential to determine the specific battery model required for your Taser Pulse. Follow these steps to ensure you select the correct replacement battery:
Check the battery life indicator on your Taser Pulse. The battery life indicator will give you an idea of the remaining charge left in the battery. If the battery is low or drained, it is time to replace it.
Refer to the user manual or online resources provided by the manufacturer to determine the specific battery model required for your Taser Pulse. Make a note of the battery model number and any additional information necessary for purchasing the correct replacement.
Once you have determined the battery model required for your Taser Pulse, it’s time to purchase the correct replacement battery. Visit authorized retailers or the manufacturer’s official website to ensure you purchase a genuine battery that meets the specifications of your Taser Pulse.
Before starting the battery replacement process, gather all the necessary tools and equipment to make the process smooth and efficient. Here’s what you will need:
Before proceeding, double-check that the screwdriver you have is compatible with the screws used in your Taser Pulse. Using a screwdriver that doesn’t fit correctly may damage the screws or make the replacement process more challenging.

Now that you have gathered the tools and necessary precautions, it’s time to locate the battery compartment in your Taser Pulse. Follow these steps to locate the battery compartment:
Refer to the user manual or online resources to identify the exact location of the battery compartment in your Taser Pulse. Manufacturers generally position the battery compartment in a convenient and accessible area of the device.
If you are unsure about the battery compartment’s location or require additional guidance, don’t hesitate to consult the user manual or refer to online resources provided by the manufacturer. These resources will provide detailed instructions and visuals to assist you in locating the battery compartment accurately.
Once you have identified the battery compartment, it’s time to remove the old battery. Follow these steps to safely remove the old battery from your Taser Pulse:
Using the appropriate screwdriver, carefully unscrew the battery compartment cover. Ensure you do it gently to avoid damaging the cover or the screws. Set aside the screws in a safe place to prevent them from getting lost.
Before removing the old battery, take note of its orientation inside the compartment. Observe how the positive and negative terminals are aligned and make a mental or written note of it. This step is essential to ensure the correct installation of the new battery later on.
With the battery orientation in mind, gently disconnect the old battery from its connections and remove it from the compartment. Be cautious not to damage any surrounding components or connectors. Place the old battery aside for proper disposal later.
With the old battery removed, it’s time to prepare the new battery for installation. Follow these steps to ensure the new battery is ready for use:
Before inserting the new battery into your Taser Pulse, ensure that it is fully charged. Manufacturers usually supply the battery partially charged, but it is always a good idea to double-check its charge level to avoid any inconveniences later on.
Carefully inspect the new battery for any signs of damage, such as dents, leaks, or corrosion. If you notice any damage to the battery, do not proceed with the installation. Contact the manufacturer or your authorized retailer for further assistance and a replacement.
Before proceeding with the installation, verify the correct battery orientation. Ensure that the positive and negative terminals are aligned in the same way as the old battery. Confirming the correct orientation is crucial to prevent any damage or malfunction in your Taser Pulse.
Now that the new battery is ready, it’s time to insert and secure it in the battery compartment. Follow these steps to ensure proper installation:
Take the new battery and carefully insert it into the battery compartment, making sure to align the positive and negative terminals correctly. Ensure that the battery sits securely in place and make any necessary adjustments to guarantee a snug fit.
Once the new battery is inserted, take the battery compartment cover and line it up with the screw holes. Carefully position the cover and press it down gently to ensure a secure fit over the battery compartment.
Using the same screwdriver you used earlier, tighten the screws on the battery compartment cover firmly. Be cautious not to overtighten the screws, as this may damage the cover or strip the screws’ threads. Once the screws are tightened correctly, the new battery is securely installed in your Taser Pulse.
With the new battery installed, it’s time to power on your Taser Pulse and test its functionality. Follow these steps to ensure everything is working correctly:
Before testing the functionality, double-check that the new battery has been installed correctly. Ensure that the positive and negative terminals are aligned, and the battery compartment cover is tightly secured.
Power on your Taser Pulse according to the manufacturer’s instructions. Confirm that the device turns on without any issues or error messages. Additionally, check if all the functions and settings are accessible and working correctly.
To further test the functionality of your Taser Pulse, test the spark or electric discharge. Ensure you do this in a safe and controlled environment, away from flammable materials or any potential harm. If the spark and functionality are working as expected, your battery replacement process is successful.
Proper disposal of the old battery is crucial to protect the environment and prevent any potential hazards. Follow these guidelines for responsible battery disposal:
Different regions may have specific regulations and guidelines for battery disposal. Familiarize yourself with your local regulations to ensure you adhere to the proper disposal methods.
Whenever possible, opt to recycle your old battery. Many recycling centers or authorized retailers accept old batteries for proper recycling. If recycling is not available in your area, dispose of the old battery responsibly in accordance with local regulations.
Under no circumstances should you throw the old battery in regular trash bins. Batteries contain chemicals that can be harmful to the environment and should not end up in landfills.
Now that you have successfully replaced the battery in your Taser Pulse, it’s important to keep up with regular maintenance and follow these additional tips:
To ensure your Taser Pulse is always ready for use, regularly check the battery life indicator. This will allow you to monitor the charge level and take appropriate action when the battery needs replacement or recharging.
Follow the manufacturer’s recommendations for cleaning your Taser Pulse. This may involve using a cleaning cloth or specific cleaning solutions to remove any dust, debris, or residue that may accumulate on the device.
When not in use, store your Taser Pulse in a safe and dry location. Ensure it is kept away from children or unauthorized individuals to prevent any accidents or misuse. Proper storage will help extend the lifespan of your device and maintain its functionality.
By following these comprehensive instructions for replacing the battery in your Taser Pulse, you can ensure the continued performance and reliability of your device. Remember to always prioritize safety and follow the manufacturer’s guidelines for the best results. Happy replacing!